
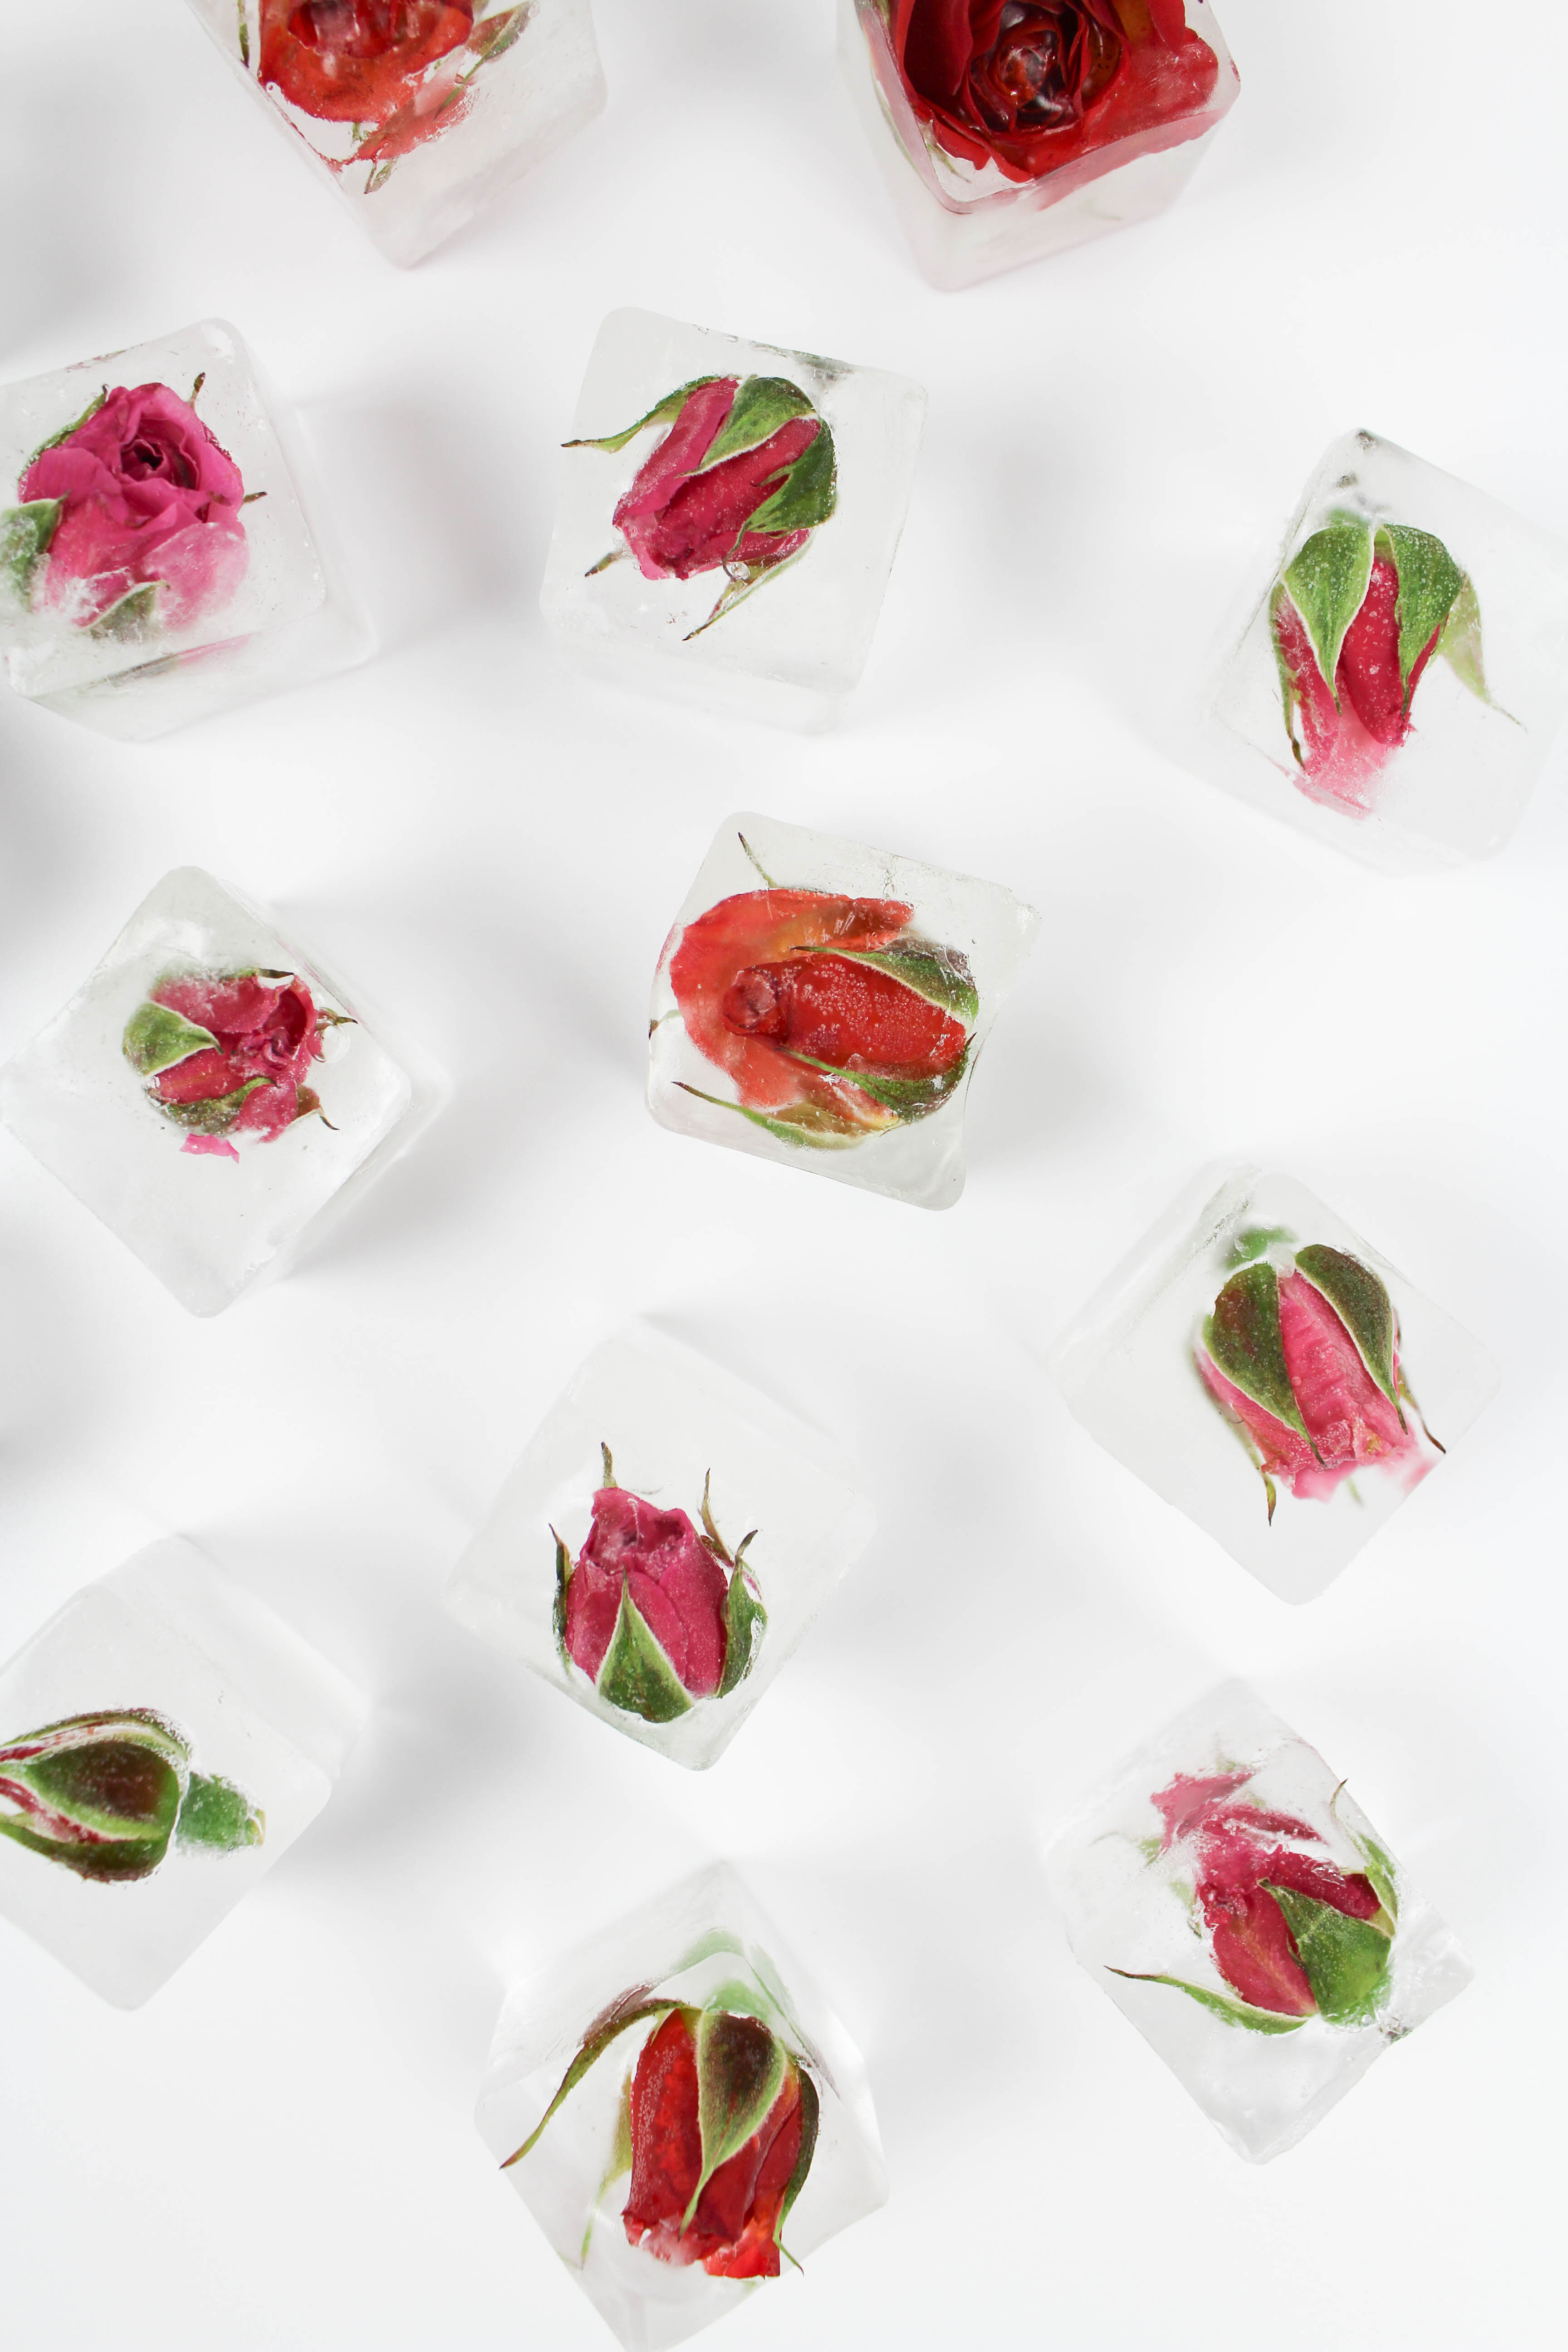
 I can’t even handle how gorg these little beauties are. I went a little picture crazy on this post, just because I had a really hard time narrowing them down. So you guys will just have to suffer through them along with me, although I don’t think you’ll complain. 😉
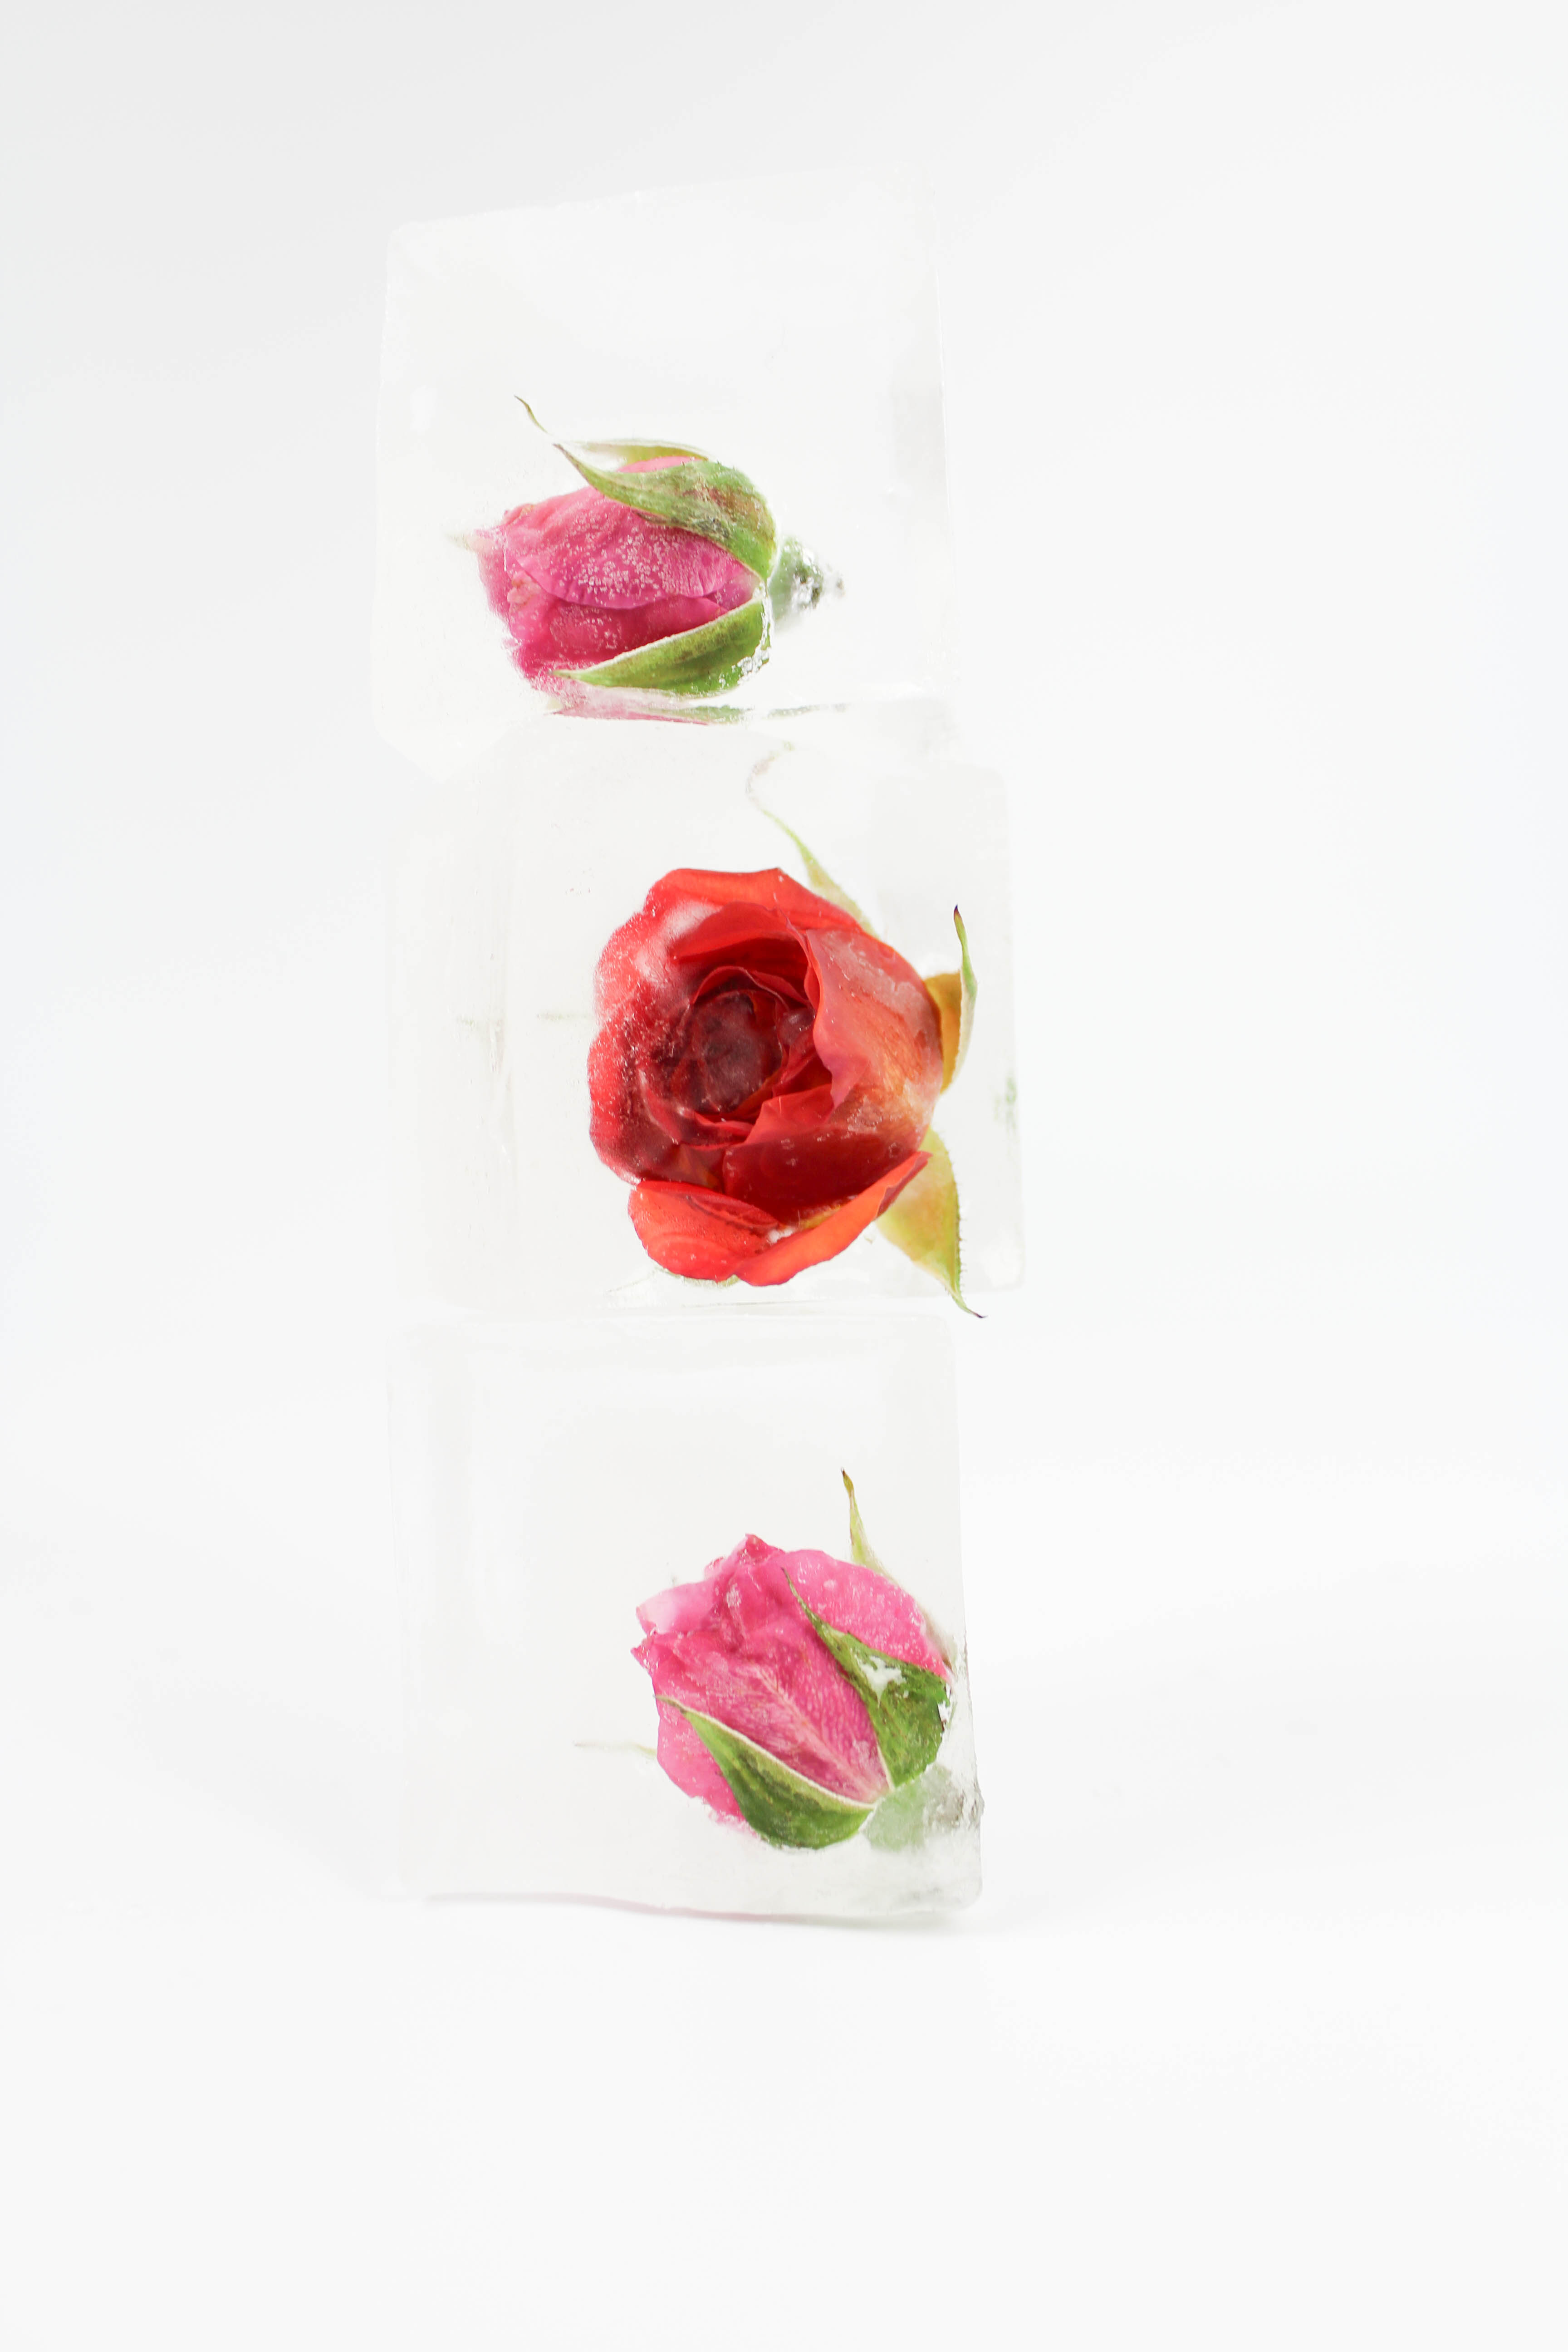
I’ve seen similar posts floating around the internet but I wanted to try some floral cubes out for myself, and after making these rose ice cubes, I’m totally jumping on the floral bandwagon. They are just SO PRETTY!
With a little patience and my water trick to help make your finished cubes super clear, you’ll be smelling sipping on roses in no time.
 Here’s what you’ll need to make your own:
- Miniature Roses – Any Color, Pesticide Free
- Filtered Water
- Silicone Ice Cube Tray (I used this one and this one)
Before we get started on these rose ice cubes, let’s talk about how to achieve that crystal clear finish. Because, it is alllll about the water. It doesn’t just happen. It takes a little bit of work, but it’s easy if you plan ahead.
Use filtered water (either bottled or use a Brita or Pur home filter). I know it sounds weird, but you’re going to want to boil it. Twice. (Trust me).
Boil the filtered water, let it cool completely, and then boil it and let it cool again a second time. It sounds like a lot of work, but it’s the secret to those see through cubes!
As soon as you have your water ready to go, it’s time to assemble these babies!
I used miniature roses for these cubes. Normal roses are too large (even for the big ice cube trays), but you could use petals too. Make sure to use pesticide free roses if you’re planning to use these ice cubes in drinks.
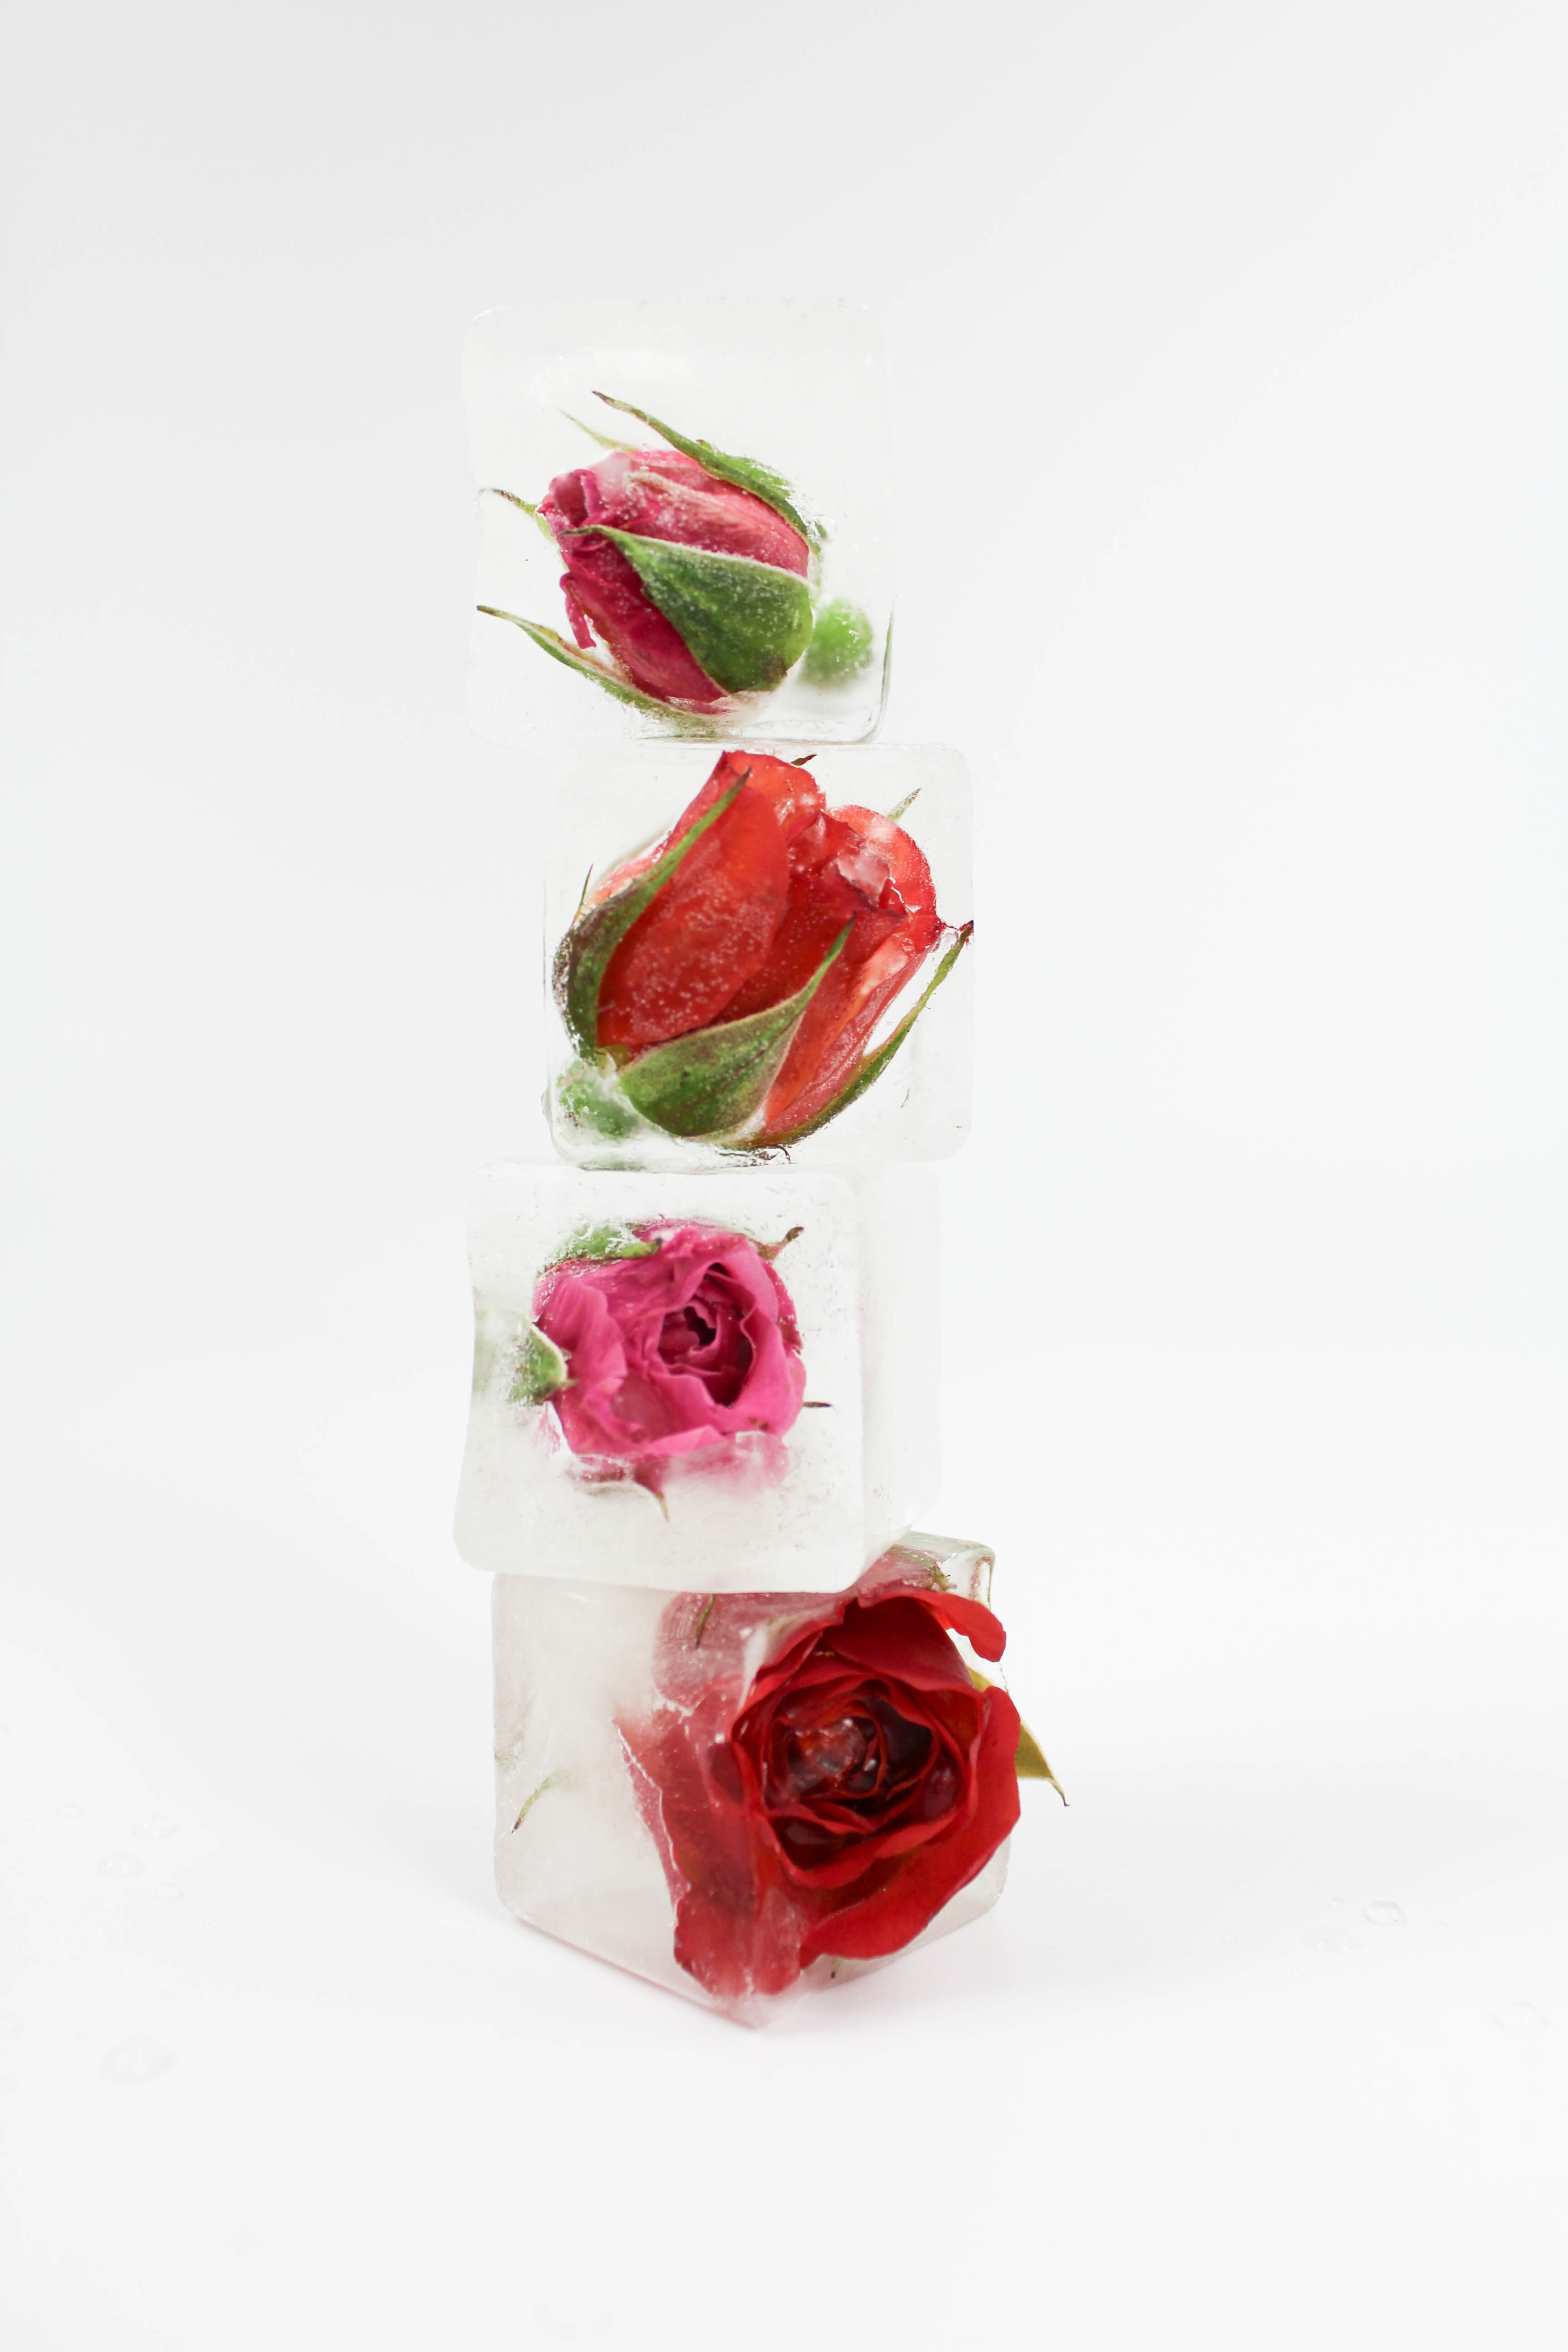
I used two different sizes of silicone ice cube trays. I used the smaller tray for the rose buds that hadn’t opened up all of the way yet and the larger tray for the big, fully open blooms. And using silicone ice cube trays will make your life SOOO much easier when it comes time to take these guys out. Trust me on that one. It’s worth the money to buy them if you don’t already own silicone trays.
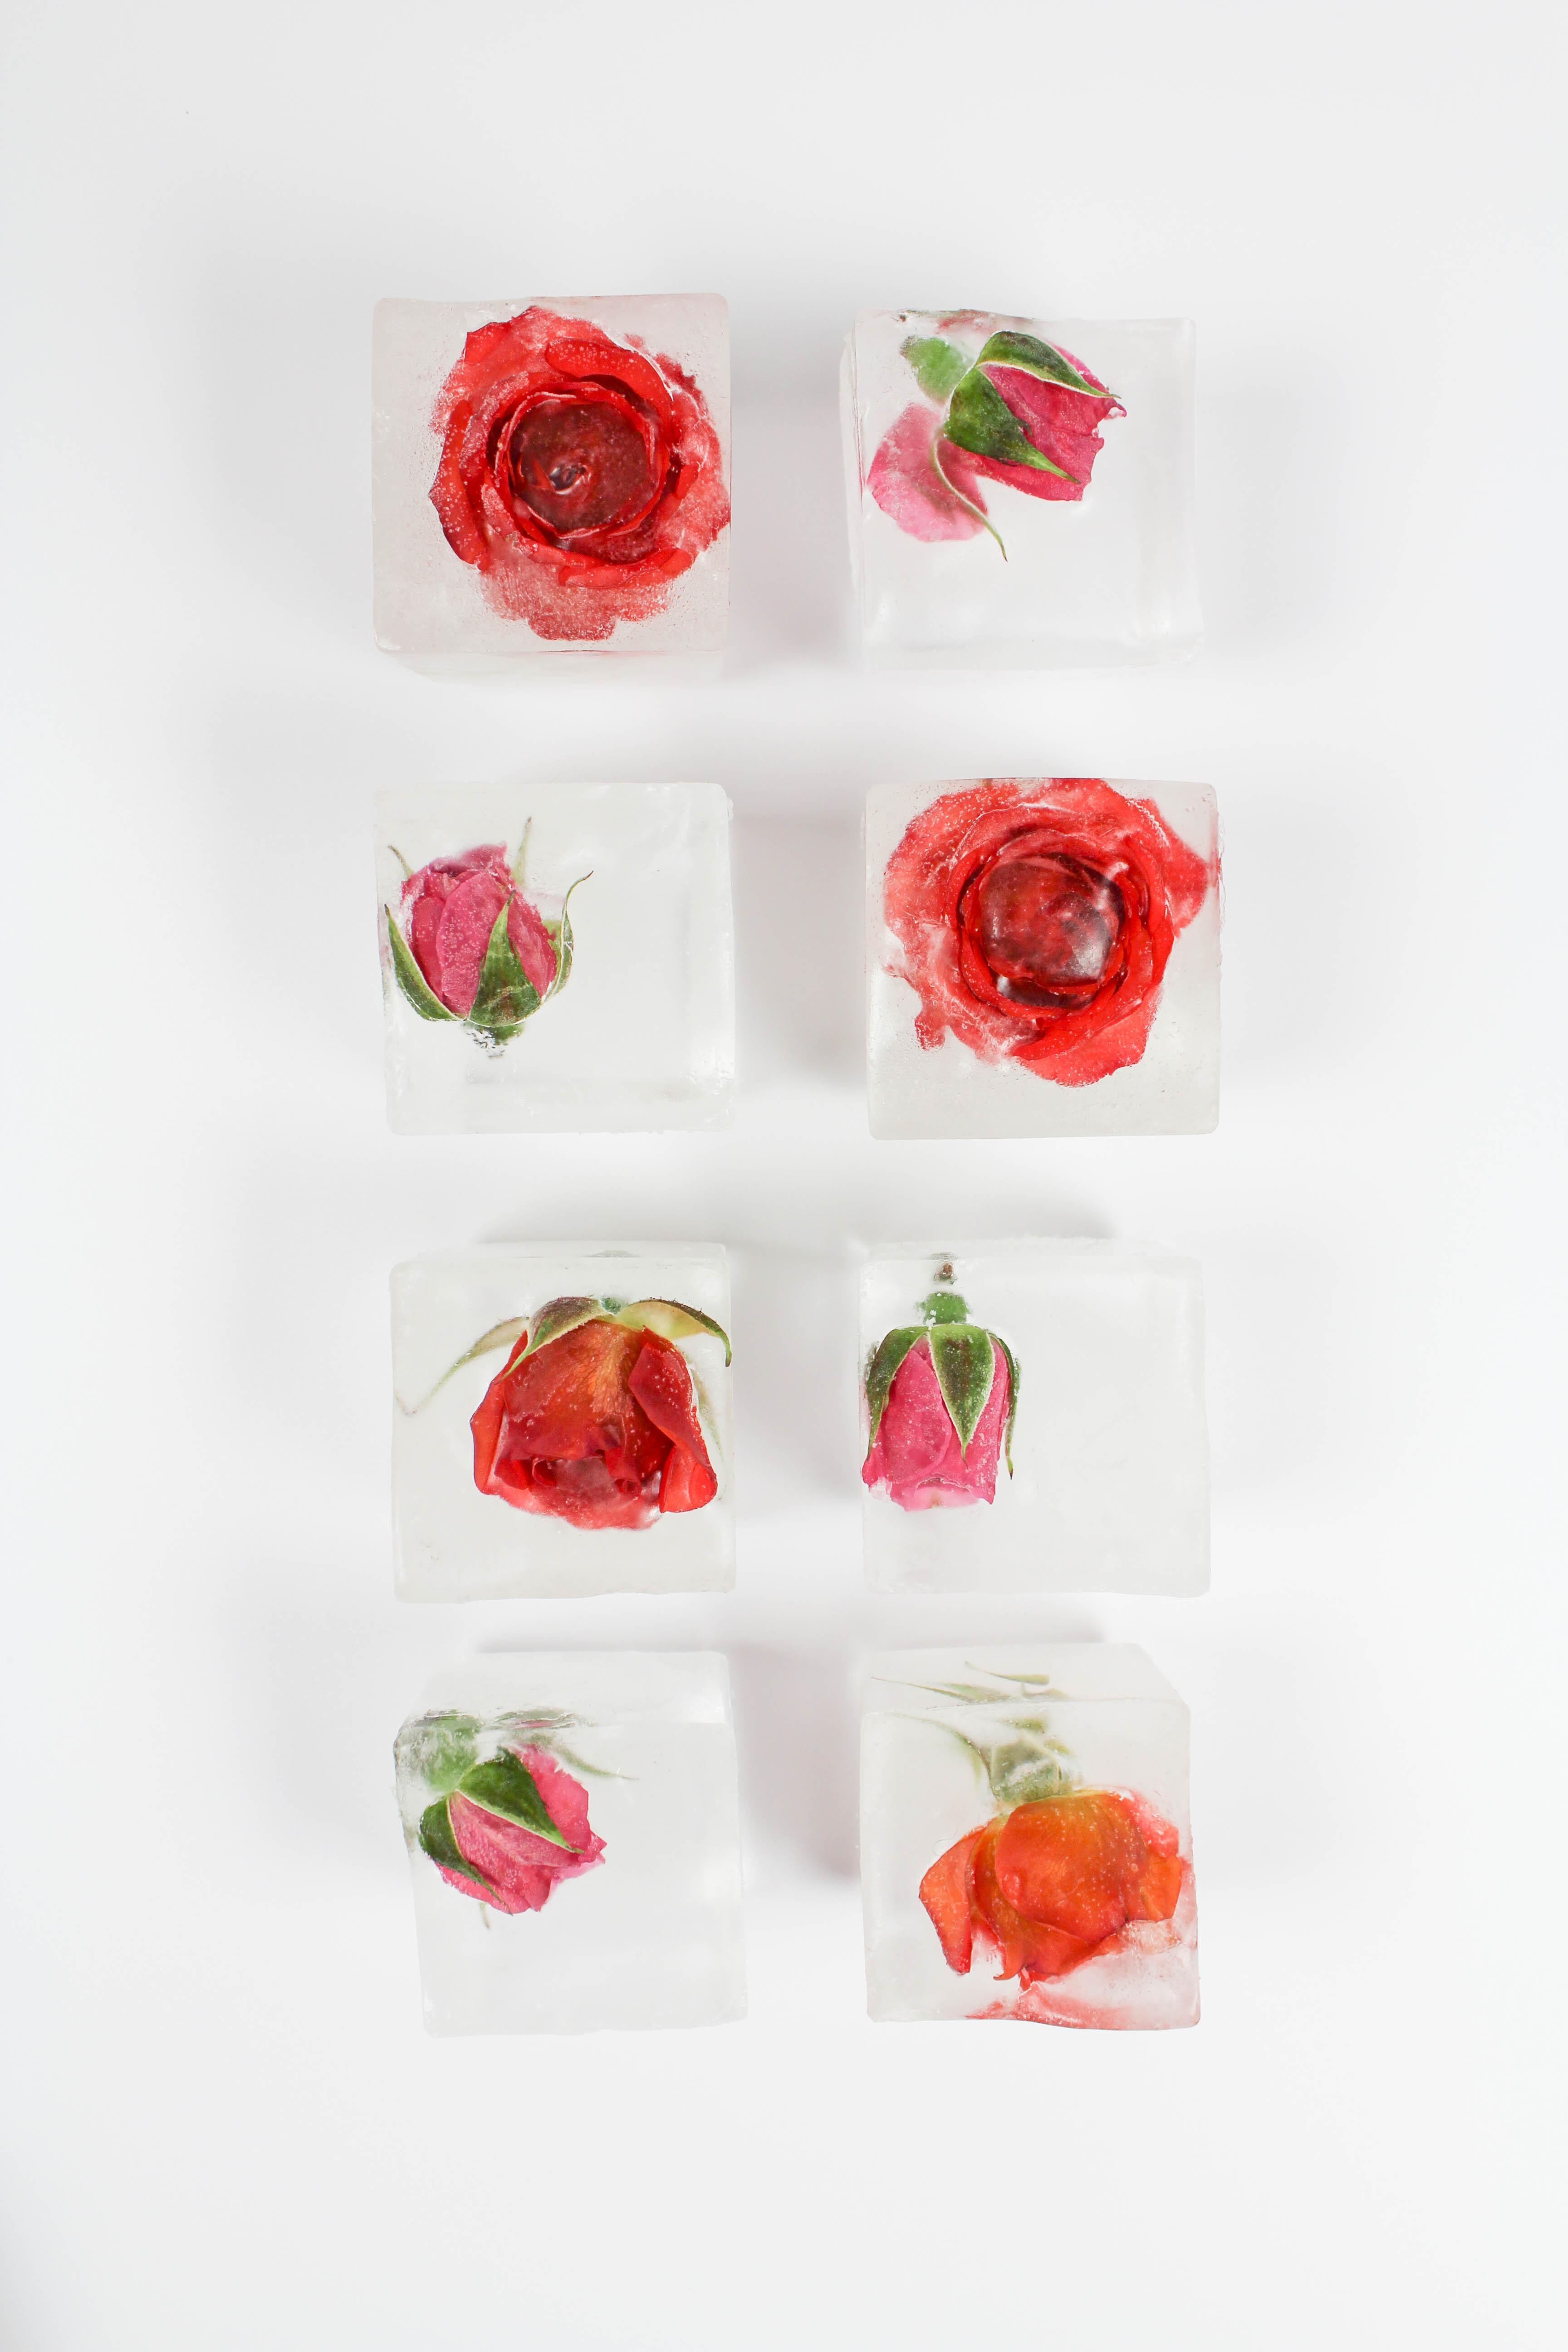
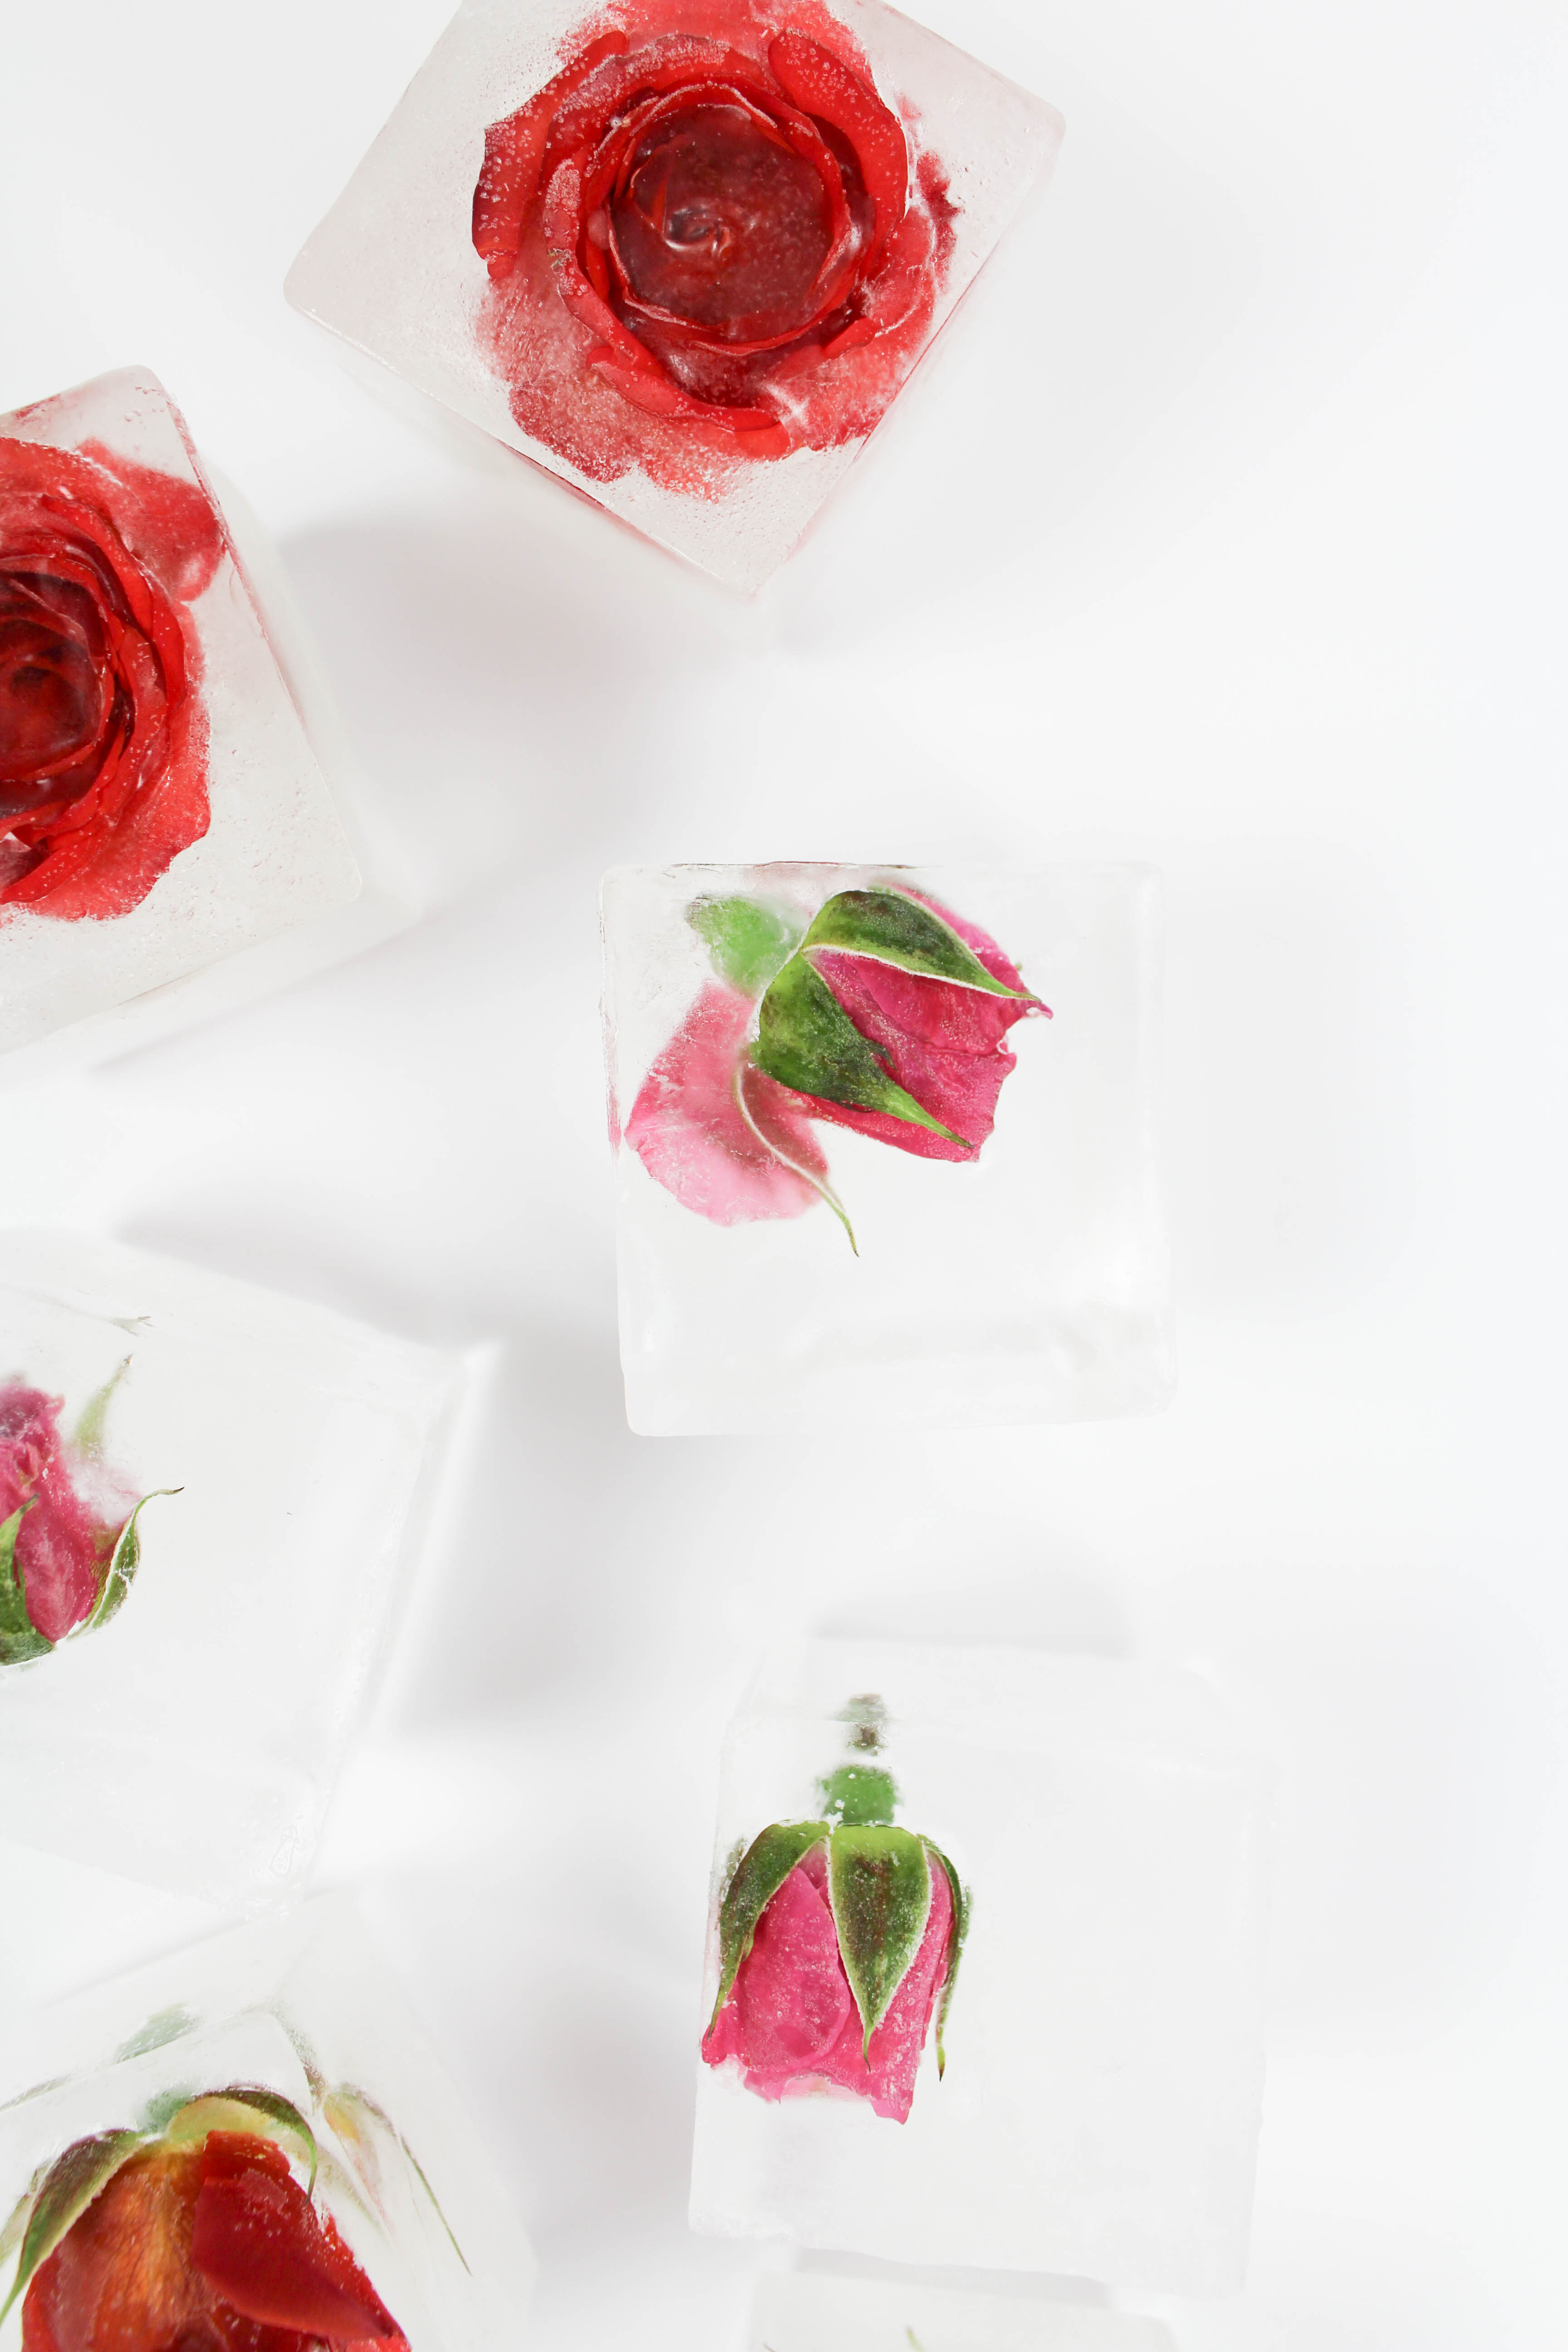
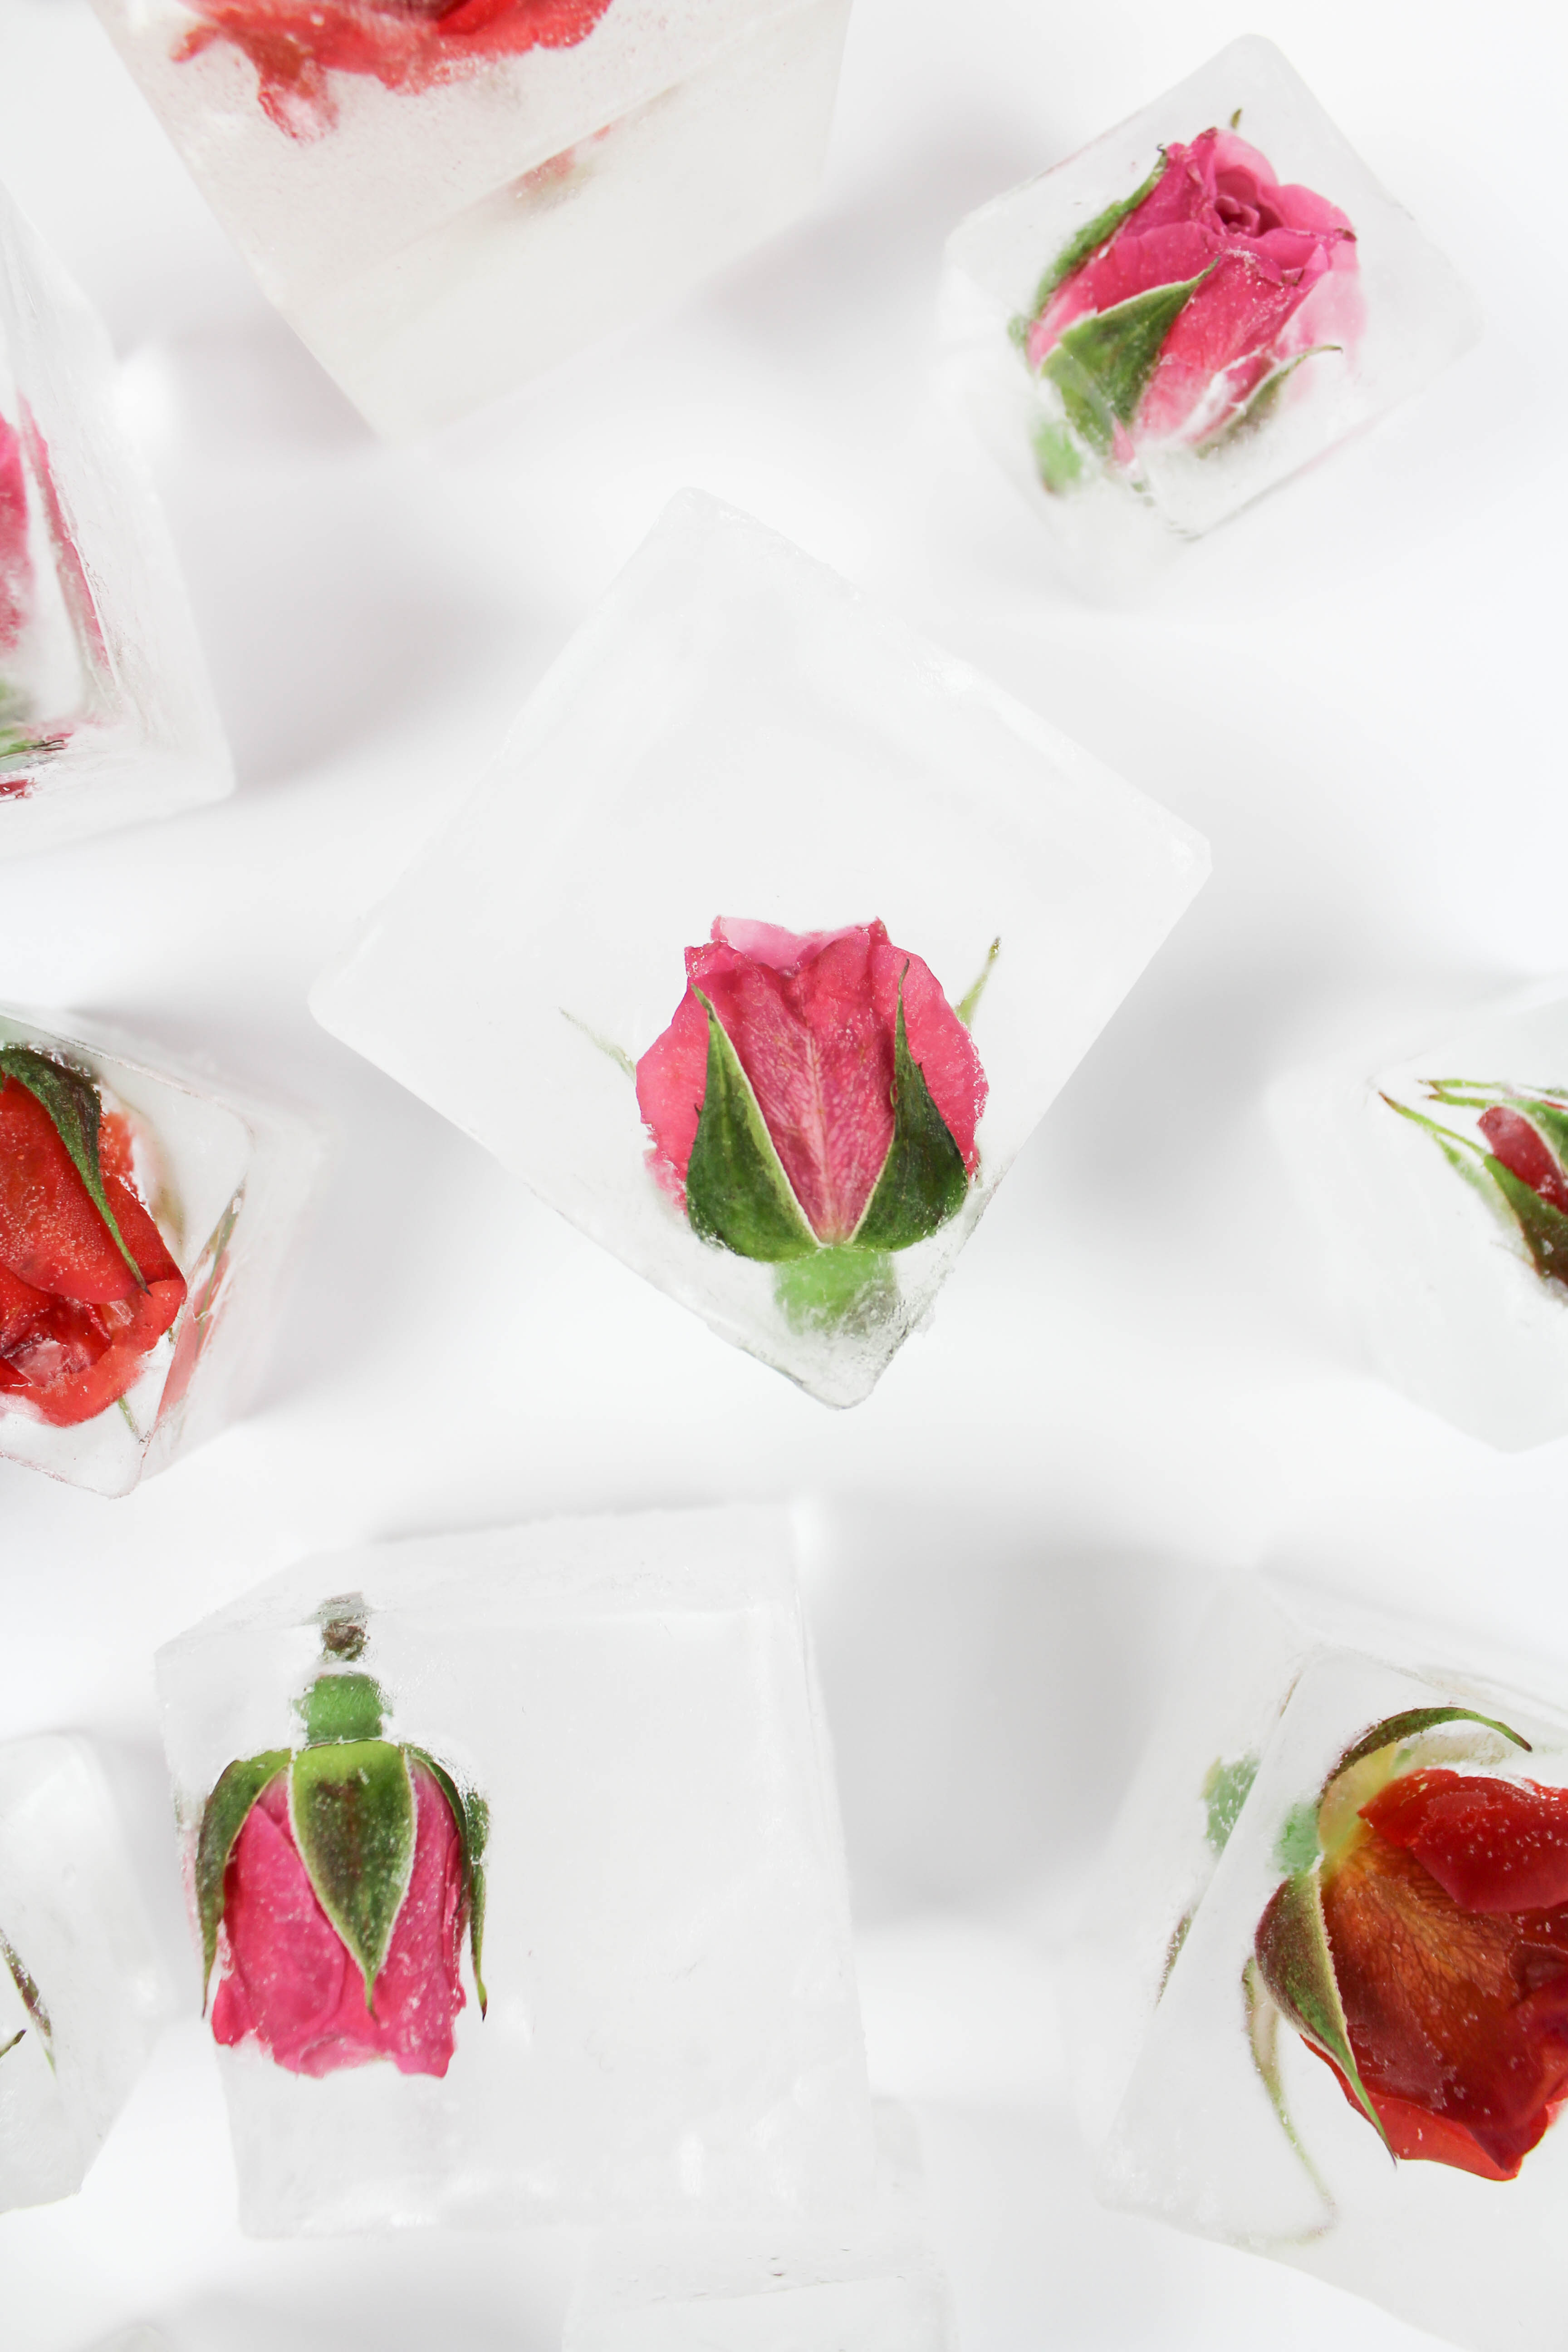
Cut the heads of each bloom off of the stems and place a single bloom into each ice cube cavity on your tray, or add a few blooms to your larger trays for a different look.
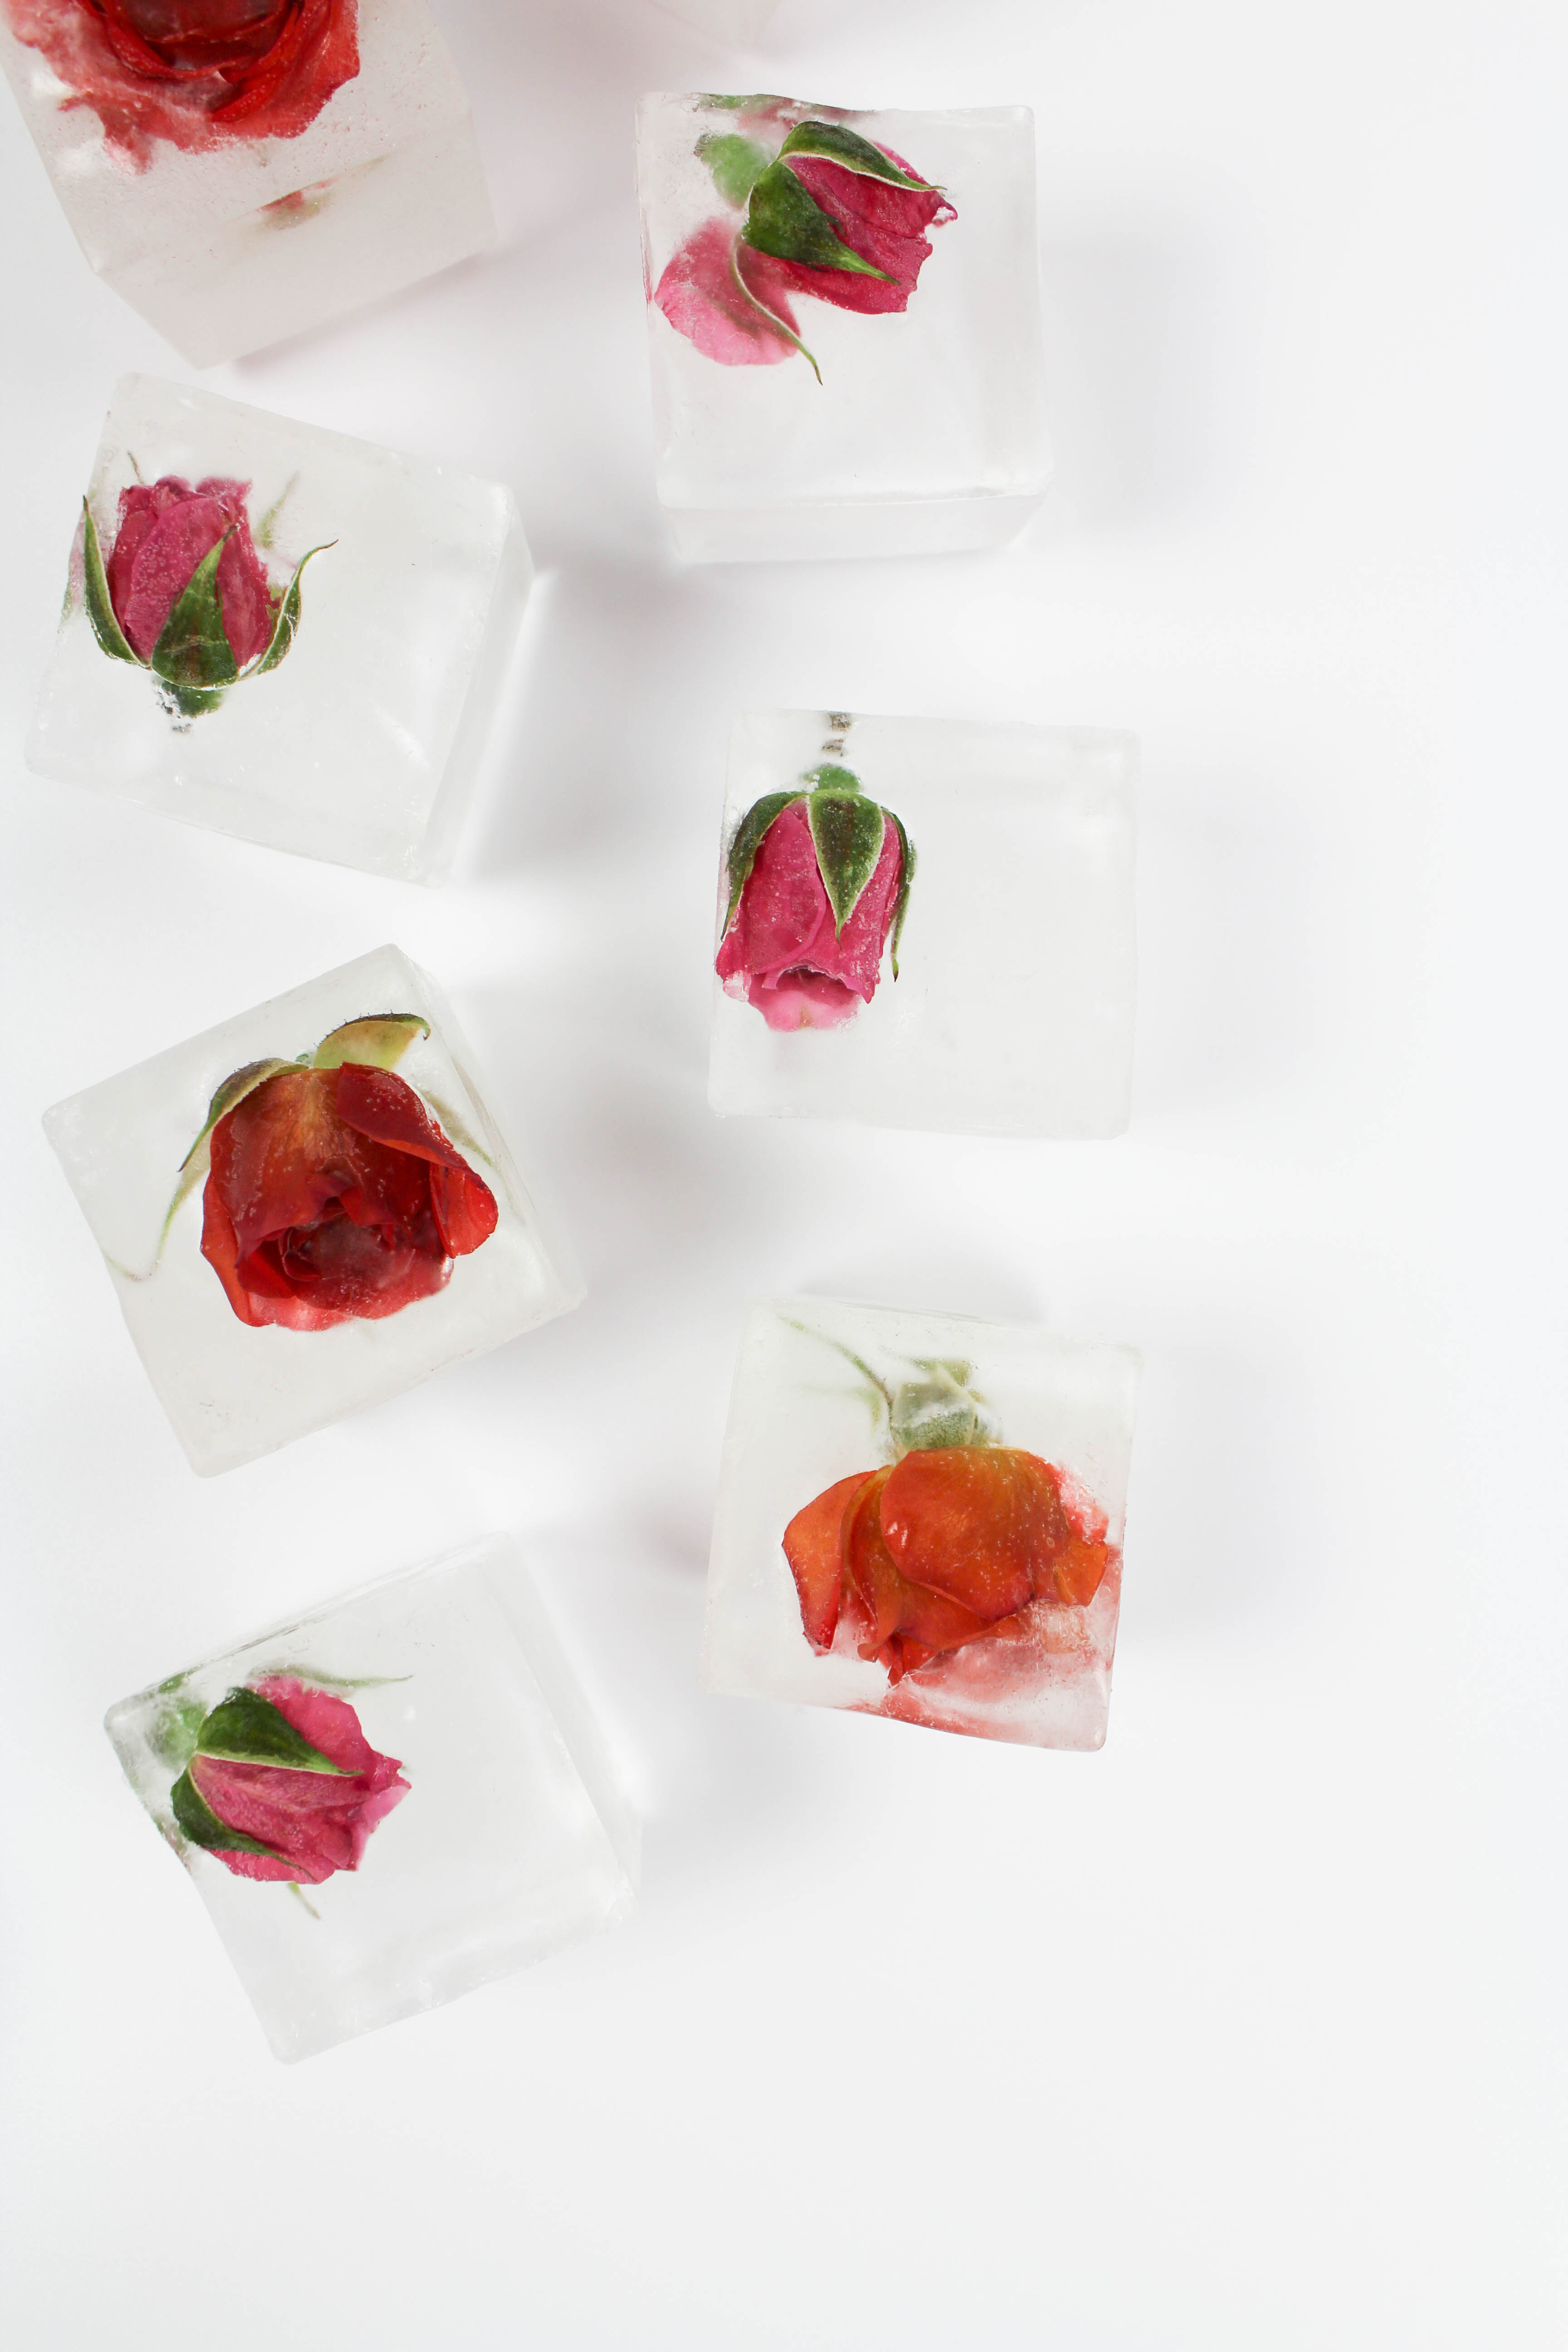
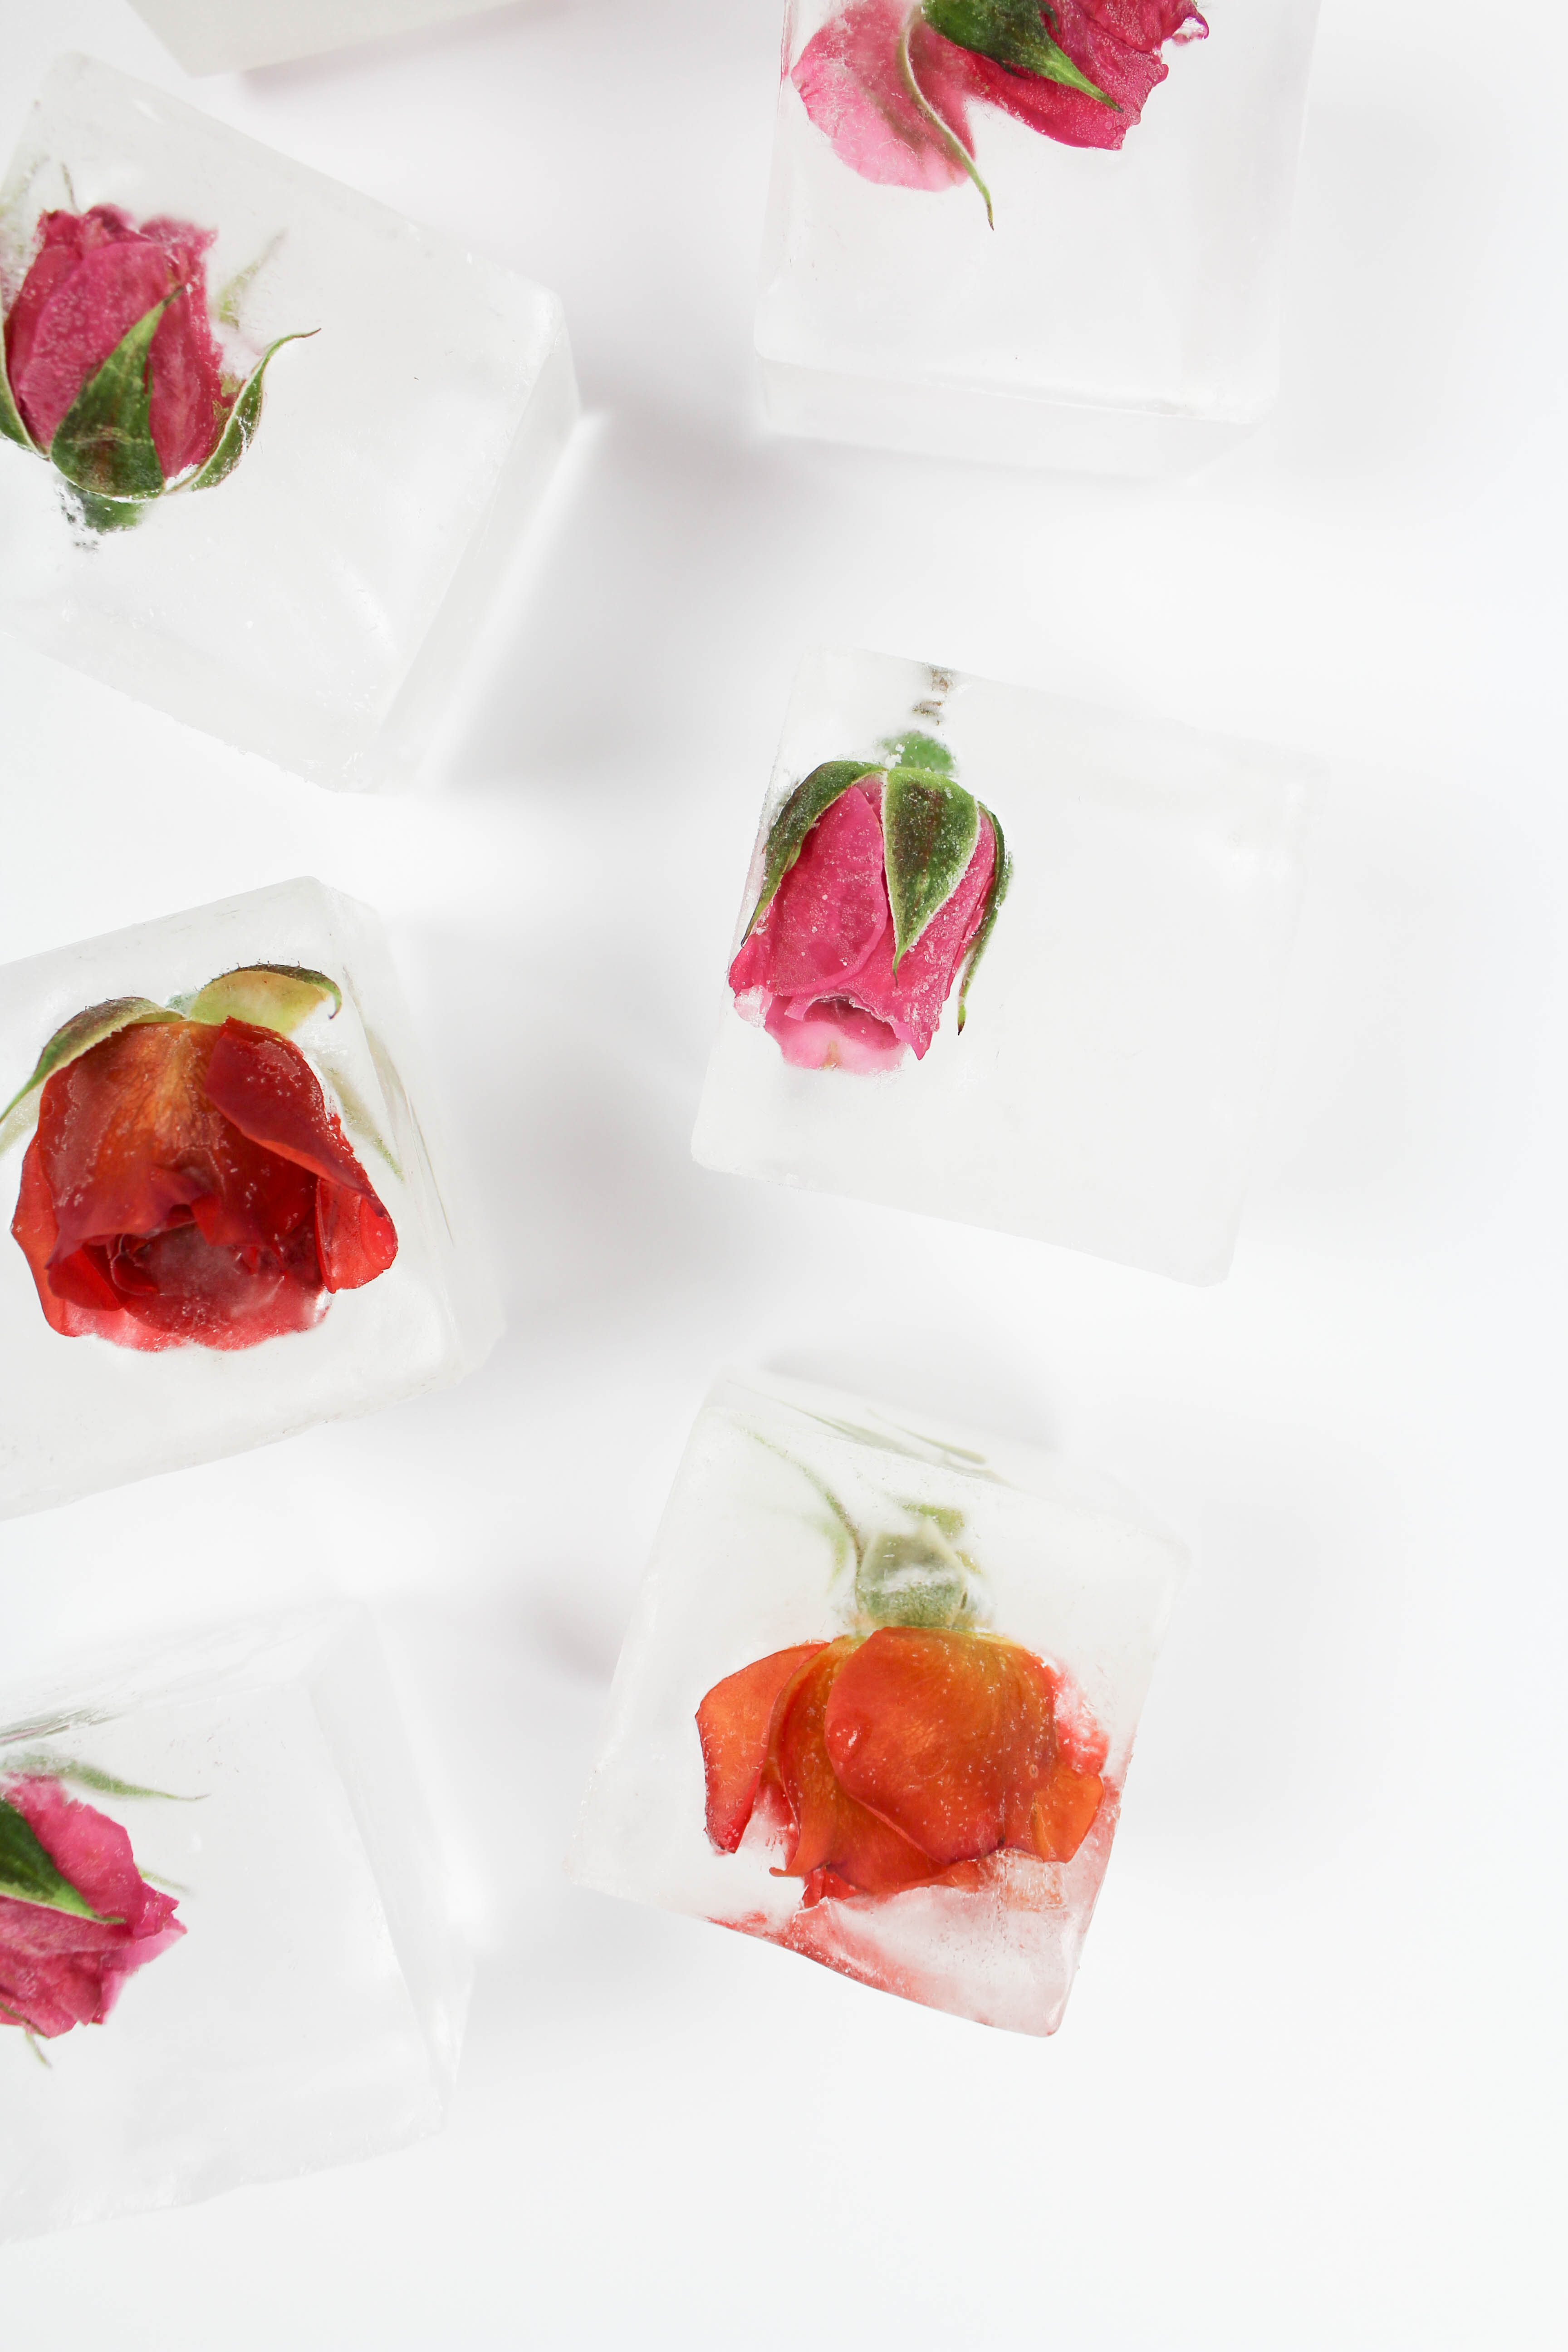 When filling your ice cube trays, there are two options. The first option is to fill the entire mold up at once. The buds will float to the top of your tray, and some will poke out of the top of the cubes when frozen, but you don’t have to go back and fill your tray in layers, multiple times for one set of ice cubes.
The second option is to fully suspend the rose buds in the center of the cubes. To do this, you’ll have to freeze the ice in layers. Pour the water into each mold, about 1/3 of the way up, and freeze completely. Once frozen, go back and fill the remainder of the cube up with water and freeze again. The first freeze will hold the buds in place so they won’t float during the second freeze.
I tried both variations and even though the blooms were suspended in the second option, I really didn’t love how they turned out. You could tell there were two distinct layers in the cube, and I wasn’t a huge fan of that. So I preferred to have the blooms popping out of the tops of the cubes a little bit more than seeing different layers, but it’s totally a preference thing. Do whatever makes you happier!
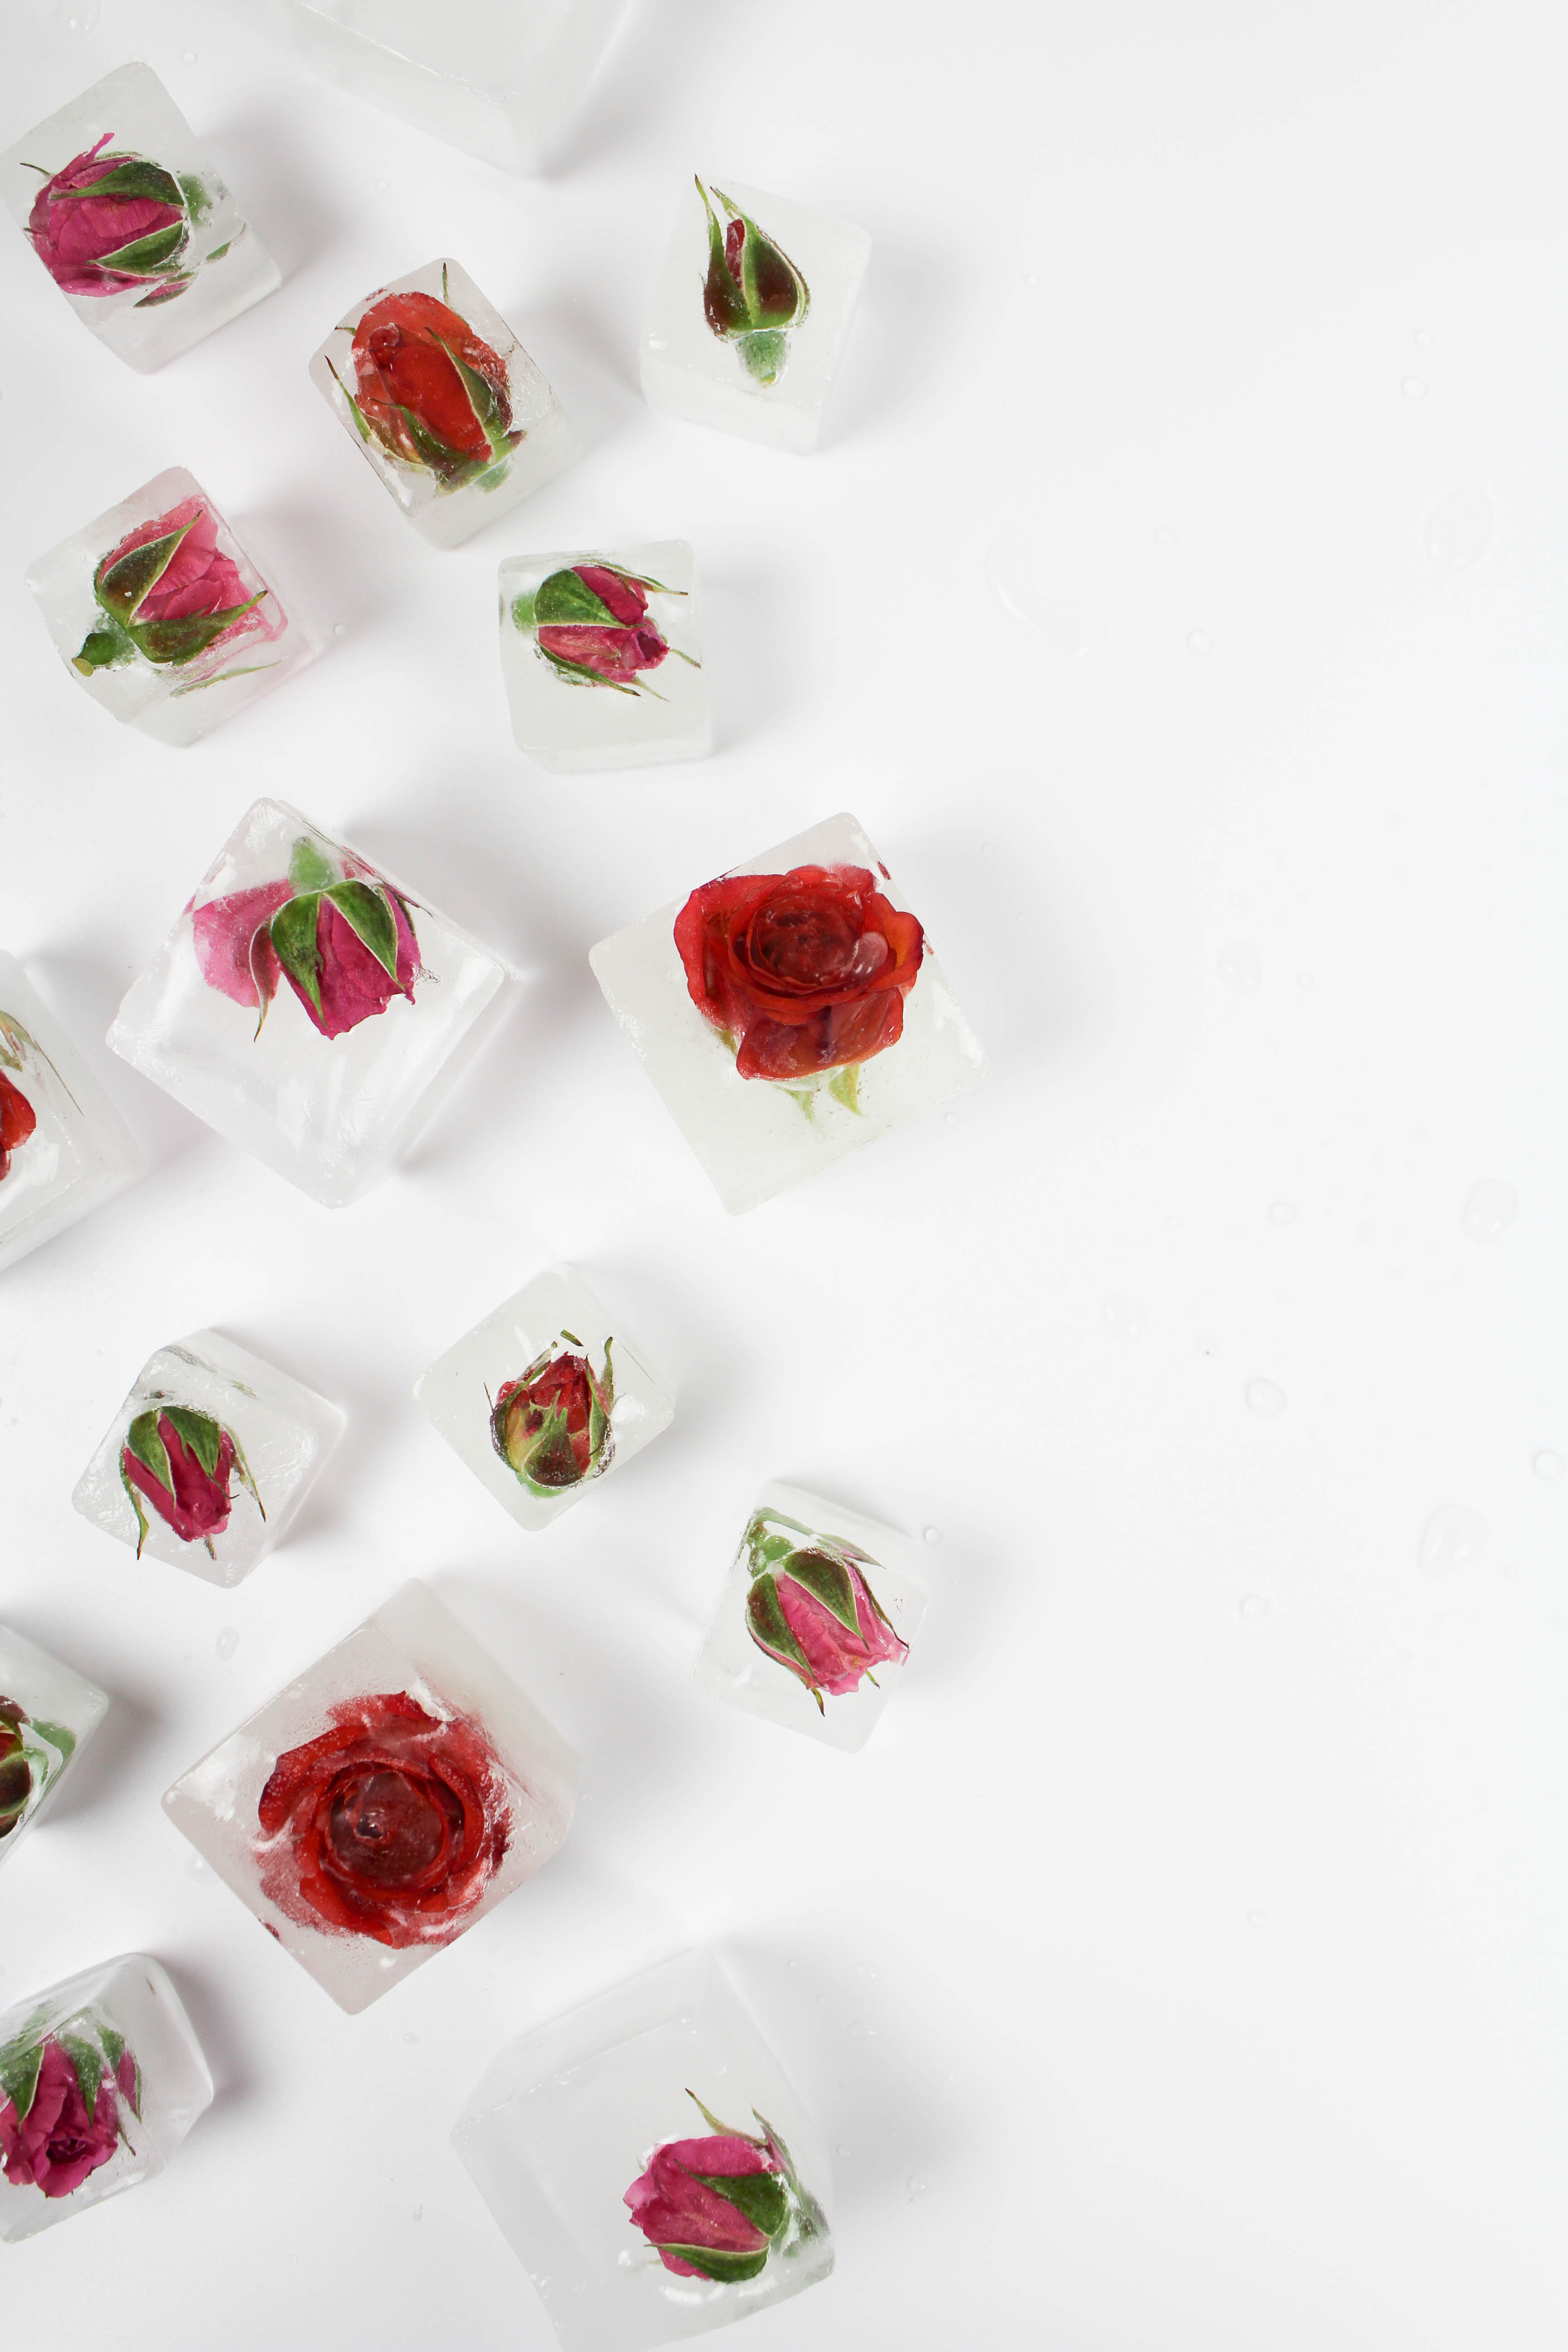
Once your cubes are completely frozen, pop these little babies out and use them in your fave cocktail, water, or to fill up an ice bucket to make a stunning statement!
 These rose ice cubes are really easy to make and will leave a lasting impression on your guests at your next event. These little guys would also be perfect for Valentine’s Day or a Gal-entine’s Day party too!
 If you’re looking for another fun way to transform your ice cubes, these ones are really fun to make too!
Are you guys going to attempt these rose ice cubes? And if so, what are you using them for?